Getting Started
First make sure you have composer installed on your machine. On the Composer website you will find a Getting Started guide.
The simplest way to get started is by defining your extension in your Composer manifest directly. Setup a fresh Joomla installation and create a composer.json file in its root directory.
Let’s say you want to install the extension com_xyz and you’ve downloaded the installation package to /Users/YourName/Downloads/com_xyz.tar.gz.
Your composer.json contents should then look as follows:
{
    "repositories": [
        {
            "type": "package",
            "package": {
                "name": "vendor/xyz",
                "type": "joomlatools-composer",
                "version": "1.0.0",
                "dist": {
                    "url": "file:////Users/YourName/Downloads/com_xyz.tar.gz",
                    "type": "tar"
                },
                "require": {
                    "joomlatools/composer": "*"
                }
            }
        }
    ],
    "require": {
        "vendor/xyz": "1.0.0"
    }
}
Using this JSON file, we have now defined our own custom package. Pay attention to the following settings:
- The
typehas to be set tojoomlatools-composer - Make sure the
urldirective points to the location of the install package.
Save this file and run from your console and within the joomla root directory:
composer install
Executing composer install will now fetch the joomlatools/composer plugin and use it to install the package into your Joomla installation.
You should get output similar to the following:
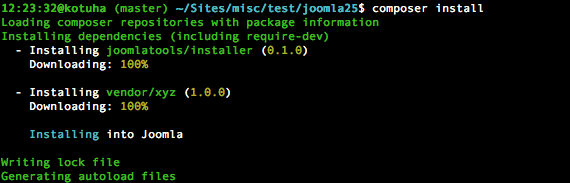
Congratulations, your Joomla setup has already been completed! Leaving you plenty of time to start cracking on your new templates and/or extensions!