
What is Let's Encrypt?
Let's Encrypt is an automated and open certificate authority that allows you to create free SSL certificate for your websites. All you need is a live domain to get started.
To work with Let's Encrypt on Plesk, you can install the Let's Encrypt extension to do all the heavy lifting for you.
Installation
This guide assumes you are in the Power User view. For more information on Views, refer to the Plesk documentation.
- Log into Plesk as an administrator.
- Go to the Extensions menu item.
- In the Extensions Catalog, search for Let's Encrypt.
- Press the Install button.

Install the certificate
Now we can request a certificate for our website:
- Go to Websites & Domains and find your website.
- Find the Let's Encrypt menu item for that domain.
- Enter a valid e-mail address. This is used to send urgent notifications and for lost key recovery.
- If your domain is also available with the
wwwsubdomain, make sure to tick the box next to Include a "www" subdomain. - Press the Install button.
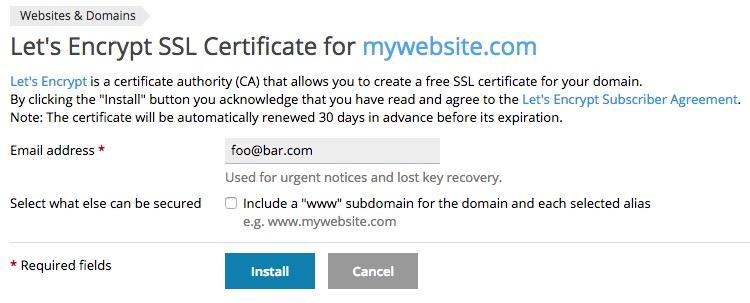
The extension will get to work in the background and ask Let's Encrypt to verify your domain. When it's finished, you will be redirected to the website overview.
Look for the green notification bar to confirm your certificate has been installed.
![]()
![]()
Enable SSL support
Finally, make sure SSL support for your site is enabled:
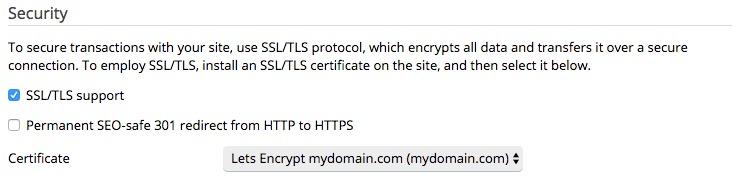
- Go to the Hosting Settings for your domain.
- Look for the Security section.
- Make sure the box next to SSL/TLS support is ticked.
- Double-check that the correct Let's Encrypt certificate is selected.
- Save your settings.
Configure Joomla
Now we only need to configure your Joomla site. We want to make sure it serves all pages and assets via SSL:
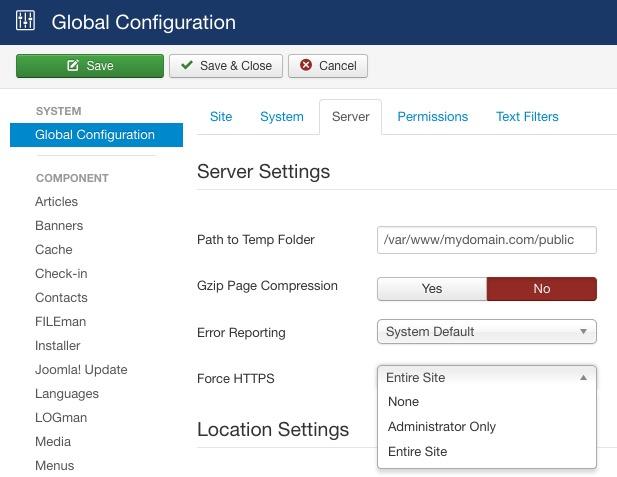
- Open up your Joomla administrator.
- Go to System » Global Configuration.
- Open the Server tab.
- Set the Force HTTPS option to Entire site.
- Browse to your website and test!
That’s it! You’ve taken an important step towards making the web browsing experience more secure and private for your users!