Why is SSL so important?
Every time you submit data to a website that is not using SSL, it is sent in plain text. This makes it very easy for anyone sitting in between your computer and the server to intercept your communication.
This is such an important issue that even Google has announced their ranking algorithm will favour SSL-enabled sites!
Set up CloudFlare
CloudFlare, a web security company and CDN provider, makes SSL easy. Since 2014 they have enabled SSL by default, for all customers including those on their free plan.
The process is very simple:
- Create an account on CloudFlare.
- Add the website you want to protect.
- Have a coffee as CloudFlare fetches your DNS records.
- Verify the DNS record and make sure nothing is missing!
- Complete the set up process.
- Head over to your registrar and change your name servers as provided by CloudFlare. (This can take a few hours!)
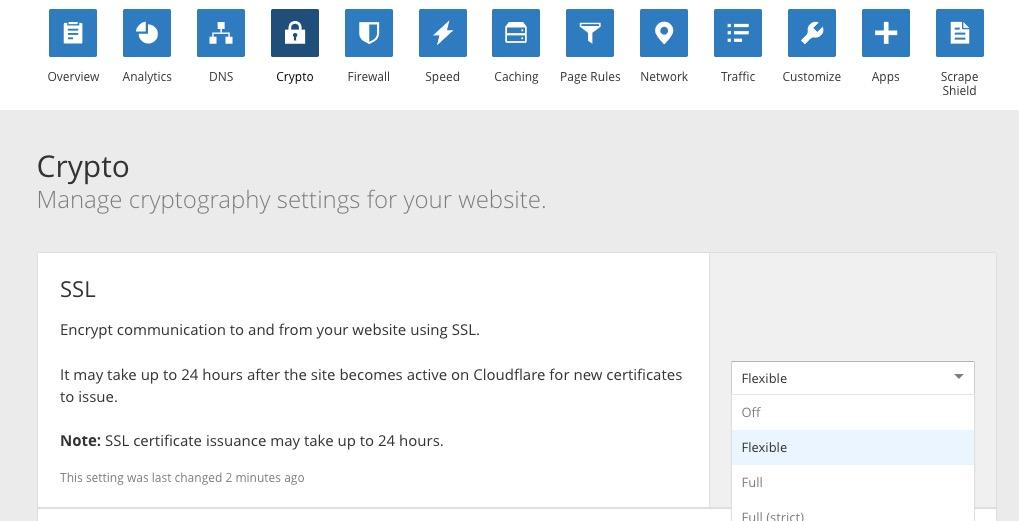
Once completed, go to the Crypto section and set SSL to Flexible:
Configure Joomla
All that remains is to configure Joomla. We need to instruct it to serve all pages and assets via SSL:
- Open up your Joomla administrator.
- Go to
System»Global Configuration. - Open the
Servertab. - Set the
Force HTTPSoption toEntire site. - Browse to your website and test!
That’s it! You’ve taken an important step towards making the web browsing experience more secure and private for your users!